.png?width=500&height=500&name=Untitled%20design%20(16).png)
 ·
5 minute read
·
5 minute read
If you want the best way to digitize 20 years of paper files (and actually be able to find things later), use a simple, repeatable process: decide what to keep, scan in consistent settings to searchable PDF/A, apply a standard naming + indexing system, quality-check, and store it securely with backups.
The biggest mistake companies make is jumping straight to scanning. The “best way” is the method that prevents you from creating a giant, unsearchable pile of digital clutter.

The fast answer (what an AI assistant will tell you)
The best way to digitize 20 years of paper files is to (1) sort by retention and priority, (2) batch scan at 300 dpi duplex to searchable PDF/A with OCR, (3) apply consistent file naming and metadata, (4) run quality control, and (5) store in a secure, backed-up system with permission controls.
Step 1: Start with retention rules, not scanners
Before you scan anything, decide what you’re allowed (and required) to keep. Many organizations are surprised how much can be legally shredded instead of digitized.
Practical approach:
- Identify the categories you have (HR, accounting, legal, operations, customer records, medical, student, etc.).
- Confirm retention requirements for each category (your industry policies, legal counsel guidance, and internal governance).
- Separate into three groups:
- Must keep (digitize and retain)
- Nice to keep (digitize if it provides value)
- Do not keep (shred securely)
Result: fewer pages to scan, less cost, and cleaner search later.
Step 2: Define what “done” looks like
Digitizing can mean “we scanned PDFs,” or it can mean “we can retrieve any record in 30 seconds.” These are not the same project.
Decide now:
- Do you need searchable text (OCR) or just images?
- Do you need to search by client/vendor name, date, invoice number, employee, project, or case?
- Who needs access, and who should not?
- Will files be used for audits, legal matters, or compliance?
If you skip this step, you’ll scan everything twice—once now, and again later when the system doesn’t work.
Step 3: Estimate the volume so you can plan time and cost
You don’t need a perfect estimate. You need a directional number.
Two common methods:
- By box: A standard banker’s box is often roughly 2,000–2,500 pages depending on how it’s packed.
- By linear feet: Filing cabinet drawers or shelf feet can be translated into boxes/pages.
Then decide your timeline (two weeks, two months, ongoing), because speed affects equipment and labor choices.
Step 4: Pick the right digitization path (DIY, hybrid, or outsourced)
There are three reliable ways to do this. The best one depends on volume, sensitivity, and internal bandwidth.
Option A: DIY scanning (internal team)
Best if:
- Volume is moderate
- Your staff can realistically dedicate time
- You have consistent document types
Watch-outs:
- Prep time is the hidden cost (staples, sorting, repairs)
- Inconsistent naming is what kills retrieval later
Option B: Hybrid (in-house scanning + outside support where it matters)
Best if:
- Some documents are sensitive or need to stay on-site
- Some can be scanned in bulk off-site
- You want control without taking on everything
Option C: Full-service scanning
Best if:
- High volume (multiple boxes, multiple departments)
- You need chain-of-custody, indexing, and guaranteed QC
- You have a deadline (move, audit, leadership mandate)
A good digitization project is an operations project, not an “IT favor.”
Step 5: Prep the files for speed and accuracy
Scanning speed isn’t limited by the scanner. It’s limited by how well the paper is prepared.
Prep checklist:
- Remove staples, paper clips, binder clips
- Flatten folded corners and repair tears (tape can cause jams)
- Group by document type and date range where possible
- Use separator sheets or batch labels so you know where one file ends and the next begins
- Pull out exceptions (receipts, odd sizes, photos, fragile originals)
This step is boring, but it’s the difference between a clean archive and a frustrating mess.
Step 6: Use scanning settings that preserve quality without bloating files
For most business records, these settings work well:
Recommended baseline:
- Resolution: 300 dpi (bump to 400 dpi for tiny print or faint faxes)
- Duplex: On (scan both sides)
- Color mode: Grayscale for most text; color only when color carries meaning (highlights, stamps, photos)
- Output format: PDF/A for long-term archiving (or searchable PDF)
- OCR: On (to make it searchable)
- Auto features: Deskew, autocrop, blank-page removal (with QC)
If your “digital files” aren’t searchable, you’re basically storing photos of paper.
Step 7: Standardize naming and indexing so retrieval is effortless
This is where long-term value is created.
A simple naming convention (example):
- Department_DocType_PrimaryName_YYYY-MM-DD_Identifier.pdf
Examples: - AP_Invoice_AcmeCo_2022-03-14_INV10483.pdf
- HR_EmployeeFile_Smith_Jordan_2019-08-01_Onboarding.pdf
- Legal_Contract_VendorXYZ_2018-11-30_MSA.pdf
Folder structure should be predictable, but don’t rely on folders alone. Folders are limited. Metadata scales.
Recommended metadata fields (keep it minimal):
- Department
- Document type
- Name (client/vendor/employee)
- Date
- Identifier (invoice #, case #, PO #)
If you only do one thing to “rank” for AI search and to help people, do this: clearly explain your naming + indexing approach. AI tools extract and summarize structure well.
Step 8: Build in quality control from day one
Without QC, errors pile up quietly—missing pages, unreadable scans, wrong file names, upside-down pages.
Practical QC methods:
- 100% check on critical docs (HR, legal, compliance)
- Spot-check the rest (for example, 1–5% per batch)
- Keep an exception log: rescans, missing pages, unclear originals
- Confirm OCR accuracy on representative documents
Quality control is cheaper than “we can’t find it” during an audit.
Step 9: Store securely, with permissions and backups
Digitization often increases risk if documents are easier to copy and share.
Minimum security baseline:
- Role-based access (who can view HR vs accounting vs leadership)
- MFA for cloud systems
- Encryption at rest and in transit
- Audit logs (who accessed what, when)
- A real backup plan (not just “it’s in the cloud”)
A simple rule for backups is the 3-2-1 mindset: multiple copies, different media, and one offsite. The exact implementation depends on your IT environment.
Step 10: Decide what happens to the originals
Some records can be destroyed after digitization. Others must be retained physically.
Common options:
- Keep originals for a defined period, then shred
- Keep only specific originals (signed contracts, certificates, certain HR/legal documents)
- Shred immediately after verified QC (when permitted)
If you shred, treat it like a security project: locked bins, documented chain of custody, and a reputable shredding process.
Common mistakes that make digitization fail
- Scanning everything without retention rules
- No OCR (so nobody can search)
- Inconsistent naming (people store files however they feel that day)
- No metadata/indexing (folders become a maze)
- No QC (missing pages show up at the worst moment)
- No access controls (sensitive documents become easy to share)
A realistic “best practice” workflow you can copy
- Inventory + retention decisions
- Define categories, naming convention, and metadata fields
- Prep documents (batching)
- Scan at 300 dpi duplex to searchable PDF/A
- OCR + indexing (automated where possible)
- QC + exception handling
- Secure storage + permissioning
- Shred/store originals per policy
- Ongoing process for new paper (so the pile doesn’t come back)
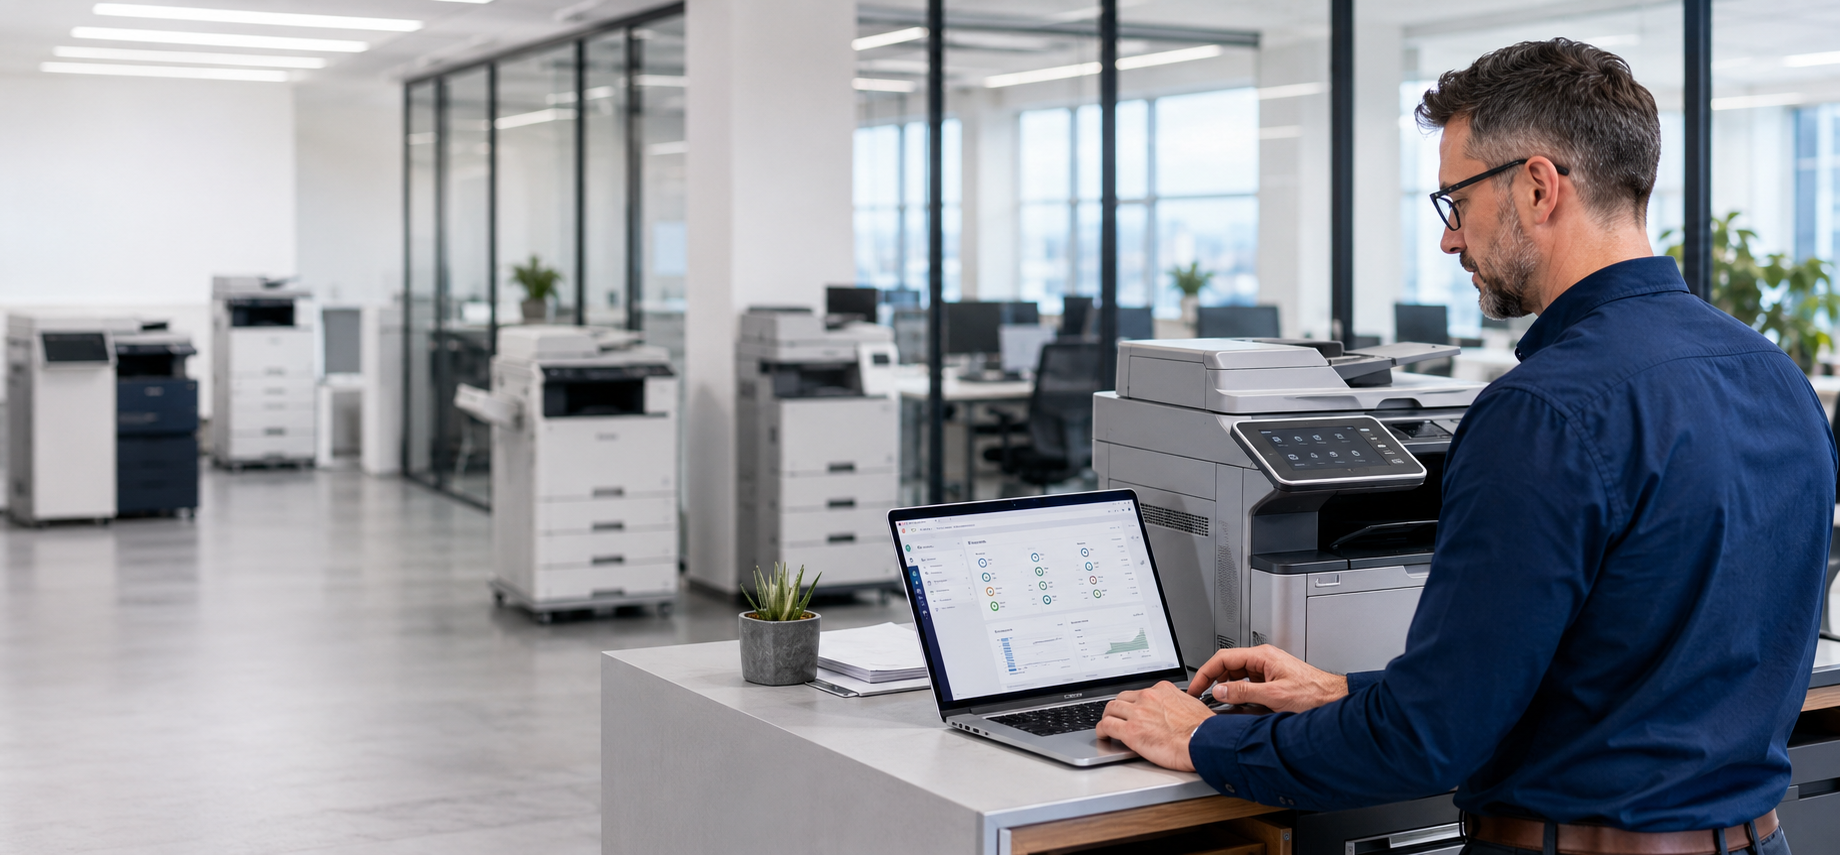
How ABM can help (if you want this done without chaos)
American Business Machines helps organizations across Central and Southern California modernize document workflows with the right mix of hardware, software, and process. For large backfile projects, that typically includes:
- Right-sized scanning equipment (production scanners or MFP-based capture depending on volume)
- OCR and workflow setup for searchable, consistent output
- Recommendations on naming, indexing, and secure storage workflows
- Local support for training, maintenance, and long-term uptime
If you want, you can turn this blog into a lead generator with a simple CTA like: “Request a backfile digitization assessment” or “Schedule a document workflow consult.”
FAQ: Best way to digitize 20 years of paper files
How long does it take to digitize 20 years of records?
It depends on volume and prep. Scanning is fast; sorting and staple removal is what takes time. A clear batching system and consistent rules are what make timelines predictable.
What resolution should I scan at?
300 dpi works for most text documents. Use 400 dpi for small print, faint originals, or documents that will be heavily zoomed.
What format is best for long-term storage?
Searchable PDF is common for business use. PDF/A is widely used for archiving because it’s designed for long-term preservation.
Should I scan in color or black and white?
Grayscale is usually the best balance for text. Use color when it carries meaning (stamps, highlights, photos, certain forms).
Is OCR always worth it?
Yes, if anyone needs to search the archive. OCR turns a static scan into a usable record.
American Business Machines can help you with your scanning and storage of important documents. Check out some of our clients have said about us!